Setup eForms

Listed below is initial setup for eForms, for both Dental4Windows and Dental4Web users.
Included are links to relevant articles for managing features
Setup eForms Dental4Windows Users
 Centaur Software host regular webinars for eForms users soon. Click here to register (link will be attached when webinars commence).
Setup the eServices Portal
Click here to Setup the eService PortalSetup Guest User eForms
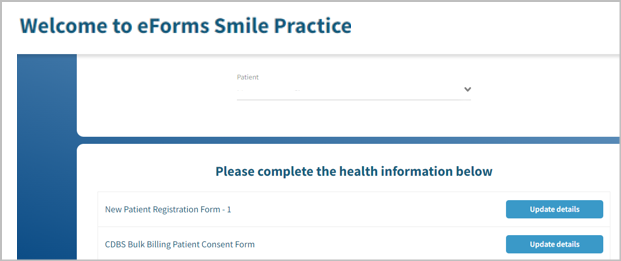
Guest User eForms allow patients to fill in eForms without having to sign up to the online portal when the patient is at the practice. In addition, when using Guest User eForms, existing patients in Dental4Windows/PracticeStudio will be able to access eForms with pre-populated information from their existing Dental4Windows/PracticeStudio patient file.
Contact Centaur Support to activate Guest User eForms. Once activated, it is recommended the URL to eForms is saved on the tablet being used by patients.
Generate Access Code for eForms Guest user
The following is only possible after Guest User eForms has been setup by Centaur.
Start of Day
- Open eForms on the tablet to be used
- Login using the Guest User eForm login determined during setup
Patient Use
For Guest User eForms to work, each patient must have their Date of Birth entered. Patient needs the following fields entered to generate an eForm access code: First name, Surname, DOB and Mobile. Data from the patients' file will be displayed on the eForm where relevant, e.g. Fields from Patients tab that are part of the eForm. This allows the patient to check their details, and update where needed.
R: Receptionist/Practice Staff
P: Patient
- R: Right click on patients' appointment > Generate eForm Access Code
- R: Note down the code displayed onscreen to provide patient shortly
- P: Agree to Terms and Conditions
- P: Enter the code generated from D4W/PSS, supplied by Receptionist
- P: Select the relevant eForm
- P: Complete the eForm and Submit
- R: Click Next Patient in eForms
Complete forms at home using Guest User
The patient can complete a form away from the practice using one-time login.
For this feature to be available ensure Yes is selected for Allow unregistered forms in General settings
From Patient Details
- Go to Patient
- Patients Tab > Find/View menu
- Send eForms link to Patient
- Tick the form/s to be sent
- Select Send
- Edit reminder message
- Method - select SMS or Email
- Type- select Easy Forms
- Sender - Select provider from the list
- Can modify the message but do not edit the link
- Click Send
From Appointment Book
This process can also be completed from the Appointment Book.
- Right click on patients appointment
- Click Send eForms link to Patient...
Set eForm Synchronisation Settings
eForms must synchronise with the D4W/PSS database to retrieve new forms submitted by a patient.
- Go to Location Management > eServices tab
- Synchronisation Settings
- Sync eForms every # mins: Enter the time to automatically sync eForms and D4W/PSS
- Sync data for D4W every # mins: Enter the time to automatically sync data from D4W/PSS with eForms, e.g. New Medical Condition
- Restore Previous Settings: Click to revert back to previous settings
- New forms: A number will show only when a new form has been retrieved
- Enable Sync: Select to enable the automated sync
- Disable Sync: Select to disable the automated sync
- Get New eForms: Select to manually retrieve eForms
- Force All: Select to manually retrieve eForms and push new D4W/PSS data to eForms
- View Sync History: Select to view the history of syncs
- Clear Sync History: Select to clear the history of syncs
- View eForms: A listing of Completed eForms will show
Managing Fields for eForms
Fields from D4W/PSS can be sorted in a logical manner, helping the user when building a form. For example, Title should be before Firstname and Surname.
Additionally, select fields can be excluded from eForms, so the user does not add that field to a form.
- Go to Location Management > eServices tab
- eForms sub-tab
- Operations menu > eForms Fields Data
- Field Name: This is the name of the field found in the patients’ file
- Sort Order: Type over the numbers to change the order they show when building a form
- Exclude: Tick to exclude the field from eForms
See Create Custom Patient Fields sectionSharing a Form with Multilocation All At Once
This feature allows practices with a multi location database to share a form to all locations under the same eService organisation.
- Within D4W database
- Go to Location Setup > General tab > Group: eServices
- In Location for sharing eForms, enter the SMS surgery code for the location that the forms will be copied from e.g. AU08100
- SMS surgery code is found in Location Setup > General tab > Group: SMS Settings > SMS surgery code
- Go to Location Management > eServices tab > eForms subtab
- Select Enable form Sharing
- Within the eServices portal
- Go to Menu
> eForms Manager
- Click the form to be shared
- Select Open in read only
- This will open the form in Form Builder
- Click on Share Form
- You will be redirected back to Form Manager
- A sharing process indicator will be displayed near the form that has been selected. Important, do not refresh the page, just wait for it to update
- Once the sharing process is completed. The form will be available at the other locations to view and to edit as required. In the event, the form that is being shared has another version, the old version will be automatically set to offline. The new version will be set to online
eForms: Add Title to Landing Page
A title can be added to the eForms landing page
- Within the eServices portal
- Go to Menu
> Practice Management
- eAppointments Management
- Display Options
- eForms Welcome Text: Enter the text to be displayed
- Click Save
Create New eForm
Videos
Video: Exclude Medical Conditions and Allergies (link coming soon)
Video: Create and Manage eForms (link coming soon)
Video: Manage Groups (Dynamic Question/Field) (link coming soon)
Video: eForms Workflow (link coming soon)
Publish an eForm
See Publish an eForm for Patients to Use sectionSetup eForms Dental4Web Users
Centaur Software host regular webinars for eForms users soon. Click here to register (link will be attached when webinars commence).Setup the eServices Portal
Click here to Setup the eService PortalSetup Guest User eForms
Guest User eForms allow patients to fill in eForms without having to sign up to the online portal when the patient is at the practice.
In addition, when using Guest User eForms, existing patients in D4Web will be able to access eForms with pre-populated information from their existing D4Web patient file.
Contact Centaur Support to activate Guest User eForms.
Once activated, it is recommended the URL to eForms is saved on the tablet being used by patients.
Generate Access Code for eForms Guest user
The following is only possible after Guest User eForms has been setup by Centaur.
Start of Day
- Open eForms on the tablet to be used
- Login using the Guest User eForm login determined during setup
Patient Use
For Guest User eForms to work, each patient must have their Firstname, Surname, DOB and Mobile entered.
Data from the patients' file will be displayed on the eForm where relevant, e.g. Fields from Patients tab that are part of the eForm. This allows the patient to check their details, and update where needed.
R: Receptionist/Practice Staff
P: Patient
- R: Right click on patients' appointment > Generate eForm Access Code
- R: Note down the code displayed onscreen to provide patient shortly
- P: Agree to Terms and Conditions
- P: Enter the code generated from D4Web, supplied by Receptionist
P: Click Fill out to Select the relevant eForm
- P: Complete the eForm and Submit
- R: Click Next Patient in eForms
Set eForm Synchronisation Settings
eForms must synchronise with the D4Web database to retrieve new forms submitted by a patient.
- InDental4Web, click the navigation menu > Management > eServices page
- eForms sub-tab
- Synchronisation Settings:
- Sync eForms every: Enter the time (in minutes) to automatically sync eForms and D4Web
- Sync data for D4W every: Enter the time (in minutes) to automatically sync data from D4Web with eForms, e.g. New Medical Condition
- Click RESTORE PREVIOUS SETTINGS: To revert back to previous settings
- Click SETUP PRACTICE: To link website
- New forms: A number will show only when a new form has been retrieved
- ENABLE SYNC: Select to enable the automated sync
- DISABLE SYNC: Select to disable the automated sync
- GET NEW EFORMS: Select to manually retrieve eForms
- FORCE ALL: Select to manually retrieve eForms and push new D4W/PSS data to eForms
- VIEW SYNC HISTORY: Select to view the history of syncs
- CLEAR SYNC HISTORY: Select to clear the history of syncs
- VIEW EFORMS: A listing of Completed eForms will show
Managing Fields for eForms
Fields from D4Web can be sorted in a logical manner, helping the user when building a form.
For example, Title should be before Firstname and Surname.
Additionally, select fields can be excluded from eForms, so the user does not add that field to a form.
- Click navigation menu > Management > eServices page
- eForms sub-tab
- Operations toolbar > eForms Fields Data
- Field Name: This is the name of the field found in the patients’ file
- Sort Order: Type over the numbers to change the order they show when building a form
- Exclude: Tick to exclude the field from eForms
- Click SAVE
Create New eForm
Publish an eForm
See Publish an eForm for Patients to Use sectionRelated Articles
Setup & Manage Appointment Status Features in Dental4Windows
Listed below is how to Add a new appointment status, setup for N status to appear automatically, setup UTA, FTA and closing book status and automatic eForm status. Feature Flash Video: Appointment Status Setup Appointment Status Setup Appointment ...Managing eForms
Listed below is how to create a new eForm, edit, delete and deactivate an eForm, add a hyperlink to a form and how to deactivate a form. Managing eForms eServices Portal Create a New eForm The below instructions cover each of the options available ...Setup the eServices Portal
Listed below is how to setup the eServcies portal, features that link with PatientDiscovery, iFrame behavioral and edit email notifications. Setup the eService Portal The following steps are recommended completing before using the eService Portal. ...Setup & Manage System Table Setup Areas in Dental4Windows
Listed below is how to Setup Public holidays, Adjust time per location, add a new payment method or remove a payment method from drop list, add personal titles, add new patient categories, setup expense categories, edit GST and/or cost to provider on ...System Tables Setup in Dental4Web
The System Tables instruction includes how to Setup & Manage: Payment Methods, Personal Titles, Ethnic groups, Patient Categories, Lab Stages, Alert Sounds, Expense Categories, Steri pack lists, Security Common reason list, Discount categories, ...