Setup & Manage Bounced Cheques in Dental4Web

When a payment via personal cheque bounces, process the bounced cheque, add penalty charges if required, auto adjusts financial information.
Follow the steps below to setup and manage.
Setup Bounced Cheque Item
- Click the navigation menu > Location Setup > Items page
- Open the Miscellaneous Category and Misc Sub-Category
- Setup an item code to be used for bounced cheque
- Financial Details tab
- Tick Bounced Payments
- Tick Show in Invoices

Need instructions on how to create a new item code Click here
Process a Bounced Cheque
If a payment by cheque bounces, it is possible to indicate this in D4Web and to charge a Bank Fee or Provider Fee if desired. 
![]() The Treatment tab will now show the Bounced Payment item with the related fees, and the invoice will be outstanding
The Treatment tab will now show the Bounced Payment item with the related fees, and the invoice will be outstanding

- Highlight the row
- In the 'Details of Receipt' section, Right click on the payment
- Select Bounce Payment
- In the Bounced Cheque Window:
- Bounced Cheque details: details of the initial cheque payment
- Bounced / Reversal Cheques details:
- Date: Enter the date the payment bounced
- Reason: Enter details of the bounced payment
- Bank Penalty: Tick to charge an additional fee to the patient
- Item: Select the Bounced Payment item
- Provider: Select the Provider the payment relates to
- Patient: Select the Patient
- Provider Penalty: Tick to charge an additional fee to the patient
- Item: Select the Bounced Payment item
- Provider: Select the Provider the payment relates to
- Patient: Select the Patient
- Click CREATE or PRINT
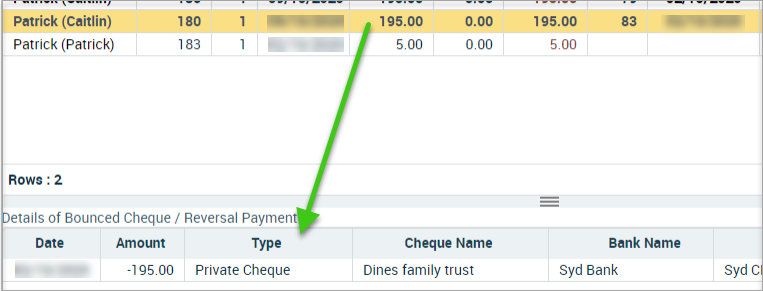
The Receipts tab will now show an negative amount and outstanding balance of the original total plus any penalties applied
Related Articles
New Zealand Dental Benefits Scheme in Dental4Web
The New Zealand Dental Benefits Scheme - Preset features, Adding & Editing, Generating Approvals & Claims Preset & Setup Features OHSA & SDSA Items OHSA & SDSA items are preset in D4Web Items page, there is nothing to do here. Click the navigation ...Dental4Windows Recommended Setup for New Customers
Below are instructions on Dental4Windows/Practice Studio Recommended Setup for New Customers. Dental4Windows/PracticeStudio Recommended Setup for New Customers Balance of Account If transferring from another system, enter the outstanding balances so ...Setup & Manage Laboratories in Dental4Windows
Listed below are instructions on how to add a new laboratory, add new lab staff, setup lab fees and add or remove lab stages. Feature Flash Video: Labs Module Setup Add a New Laboratory Category of Work Laboratory Categories of Work are the type of ...Setup & Manage Appointment Status Features in Dental4Windows
Listed below is how to Add a new appointment status, setup for N status to appear automatically, setup UTA, FTA and closing book status and automatic eForm status. Feature Flash Video: Appointment Status Setup Appointment Status Setup Appointment ...Setup & Manage Prosthetist Books in Dental4Windows
Listed below is how to complete Prosthetist Appointment Book setup and how to create appointments. Prosthetist: Appointment Book Setup and Usage A dental prosthetist is qualified to make different dental prosthetics and also see private patients for ...