Setup New Provider & Manage their Records in Dental4Windows

Provider numbers for Dental Hygienists, Therapists & Oral Health Therapists for CDBS claims

From 1 July 2022, dental hygienists, dental therapists, and oral health therapists can access Medicare provider numbers to directly claim for services under the Child Dental Benefits Schedule (CDBS).
Once eligible, setup Dental4Windows to allow dental hygienists, dental therapists, and oral health therapists the ability to process CDBS claims. Follow the steps for Add a New Provider in section below ensuring the provider number issued is entered into the Provider ID 1 field.
Setup New Providers
 Providers need to have Add New Appointment Book, and if working under their own ABN, create a new ABN
and add their Bank Account.
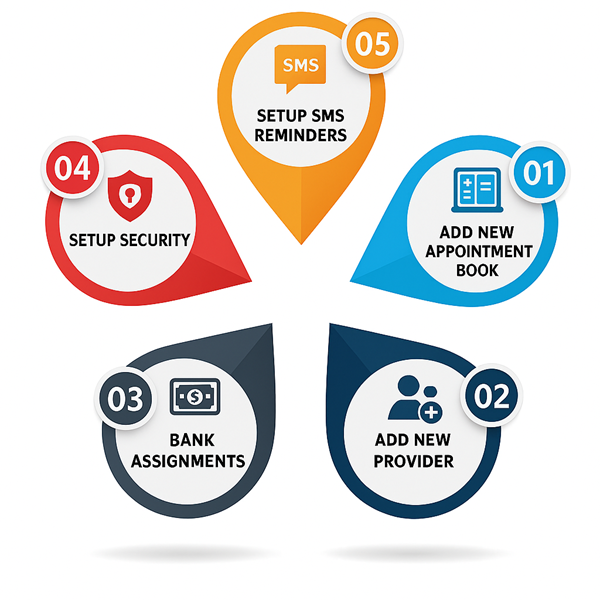
Feature Flash Video: Add New Provider
Add New Provider
- Go to Location Management > Providers tab
- Operations menu > New Record
- Read instructions and click OK to proceed
- Fill in the details of the Provider. The following details are required for accurate record-keeping, reporting and claiming
- Title
- Surname
- First Name
- Provider Number
- GST Number
- Merchant ID (ePayments and claims)
- Certegy ID (for National Dental Plan only)
- Prescriber No (for electronic prescriptions only)
- Fee Level (only if working with Provider-based Fees)
- Appointment Book
- SMS code
- Commission (only if to be calculated on reports)
- Position
For easy reference in drop lists throughout the system, change the Code to the providers initials.
If you have Appointment Automation setup, the new provider needs to be added.Mark a Provider as Inactive
When a provider is no longer working at the practice, the appointment book and provider card need to be marked at inactive.
Add New Hygienist
Hygienists do not have provider numbers and invoices must be attached to a Provider. If the Hygienist is working with several Providers they must be added as a separate Hygienists for reporting purposes.
First Add New Appointment Book and if operating under their own ABN, setup the ABN and bank account first. - Go to Location Management > Providers tab
- Operations menu > New Record
- Read instructions and click OK to proceed
- Fill in the details of the hygienist, the following details are required for accurate record-keeping, reporting and claiming
- Title
- Surname
- First Name
- Provider Number (of the Dentist working alongside)
- GST Number
- Merchant ID (ePayments and claims)
- Certegy ID (for National Dental Plan only)
- Prescriber No (for electronic prescriptions only)
- Fee Level (only if working with Provider-based Fees)
- Appointment Book
- Commission (only if to be calculated on reports)
- Position: Hygienist
After adding the hygienist, Setup the Bank RedirectionsRepeat the steps if the Hygienist will work alongside another Dentist and add that Dentists' Provider ID to the new file. In this case, change the Code to represent who the Hygienist is working with, e.g. HPM - Hygienist with Dr Phil McCavity
Add a New Locum
A Locum is a person who temporarily fulfills the duties of another member of the same profession. When a Locum is set up in Dental4Windows, there are many factors that must be taken into account.
Questions to consider:
- Will the provider be paid by commission?
- Is the Locum responsible for their own expenses?
- How are payments to be reflected in Banking?
- Is the Locum responsible for paying their own GST?
- What security access will the Locum have?
Add the new Provider
- Go to Location Management > Providers tab
- Operations menu > New Record
- Read instructions and click OK to proceed
- Enter the details of the new Provider
- Add the following information (where applicable)
- Commission Rate
- Cost for Expenses
- Provider ID
- GST No (ABN)
- HICAPS Merchant ID
- Certegy Merchant ID (for National Dental Plan only)
The Commission rate and Cost for Expenses will depend on the agreement between the Locum and the Practice.
An Appointment Book (Add New Appointment Book) may be set up, or the main Provider's Appointment Book may be used.Other factors to consider include the creation of a username and password in Security, adding a new GST No. (ABN) and Letterhead & Logo.
When the Locum is no longer working at the Practice, remove the tick from the Is Active
checkbox. If an Appointment Book was created, it should also be made Inactive, Inactivate (remove)/Reactivate an Appointment Book.
Banking
Bank Redirections must be added to show where payments are to be banked when treatment is performed by the Locum.
The practice will have the option to show payments for treatment performed by the Locum as being banked to the practice bank account, or may wish to separate the payments by adding a new Bank Account (link coming soon) to represent the locum.
Reports
The following reports are recommended:
Add a New Dental Assistant (Cert IV Radiography Elective)
The Dental Assistant must also register with the appropriate government bodies in their state or territory for the use of ionising radiation apparatus.
Dental Assistants generally do not receive payment for x-rays performed. This payment will go either to the practice owner, or the provider in which the Dental Assistant is working under.
Add Position
A new position needs to be created before setting up a new Dental Assistant.
- Go to Location Management > Providers tab
- Operations menu > Professions List
- Click Add
- Enter DA-Cert IV
- Tick Show in Accounts
- Click OK
Add the new Dental Assistant
The Dental Assistant is added as a Provider, and the dentist's Provider Number they are working under is entered. This allows health fund claiming for the patient.
If a Dental Assistant is working alongside multiple dentists, multiple records would need to be created.
- Go to Location Management > Providers tab
- Operations menu > New Record
- Read instructions and click OK to proceed
- Enter the details of this new Dental Assistant ensuring the Provider number (of the dentist) and Position are entered
Adding the item into Treatment
When the Dental Assistant takes the x-ray, the Provider code corresponding to the dentist whom has instructed this should be used.
- Go to Patient Details > Treatment tab
- Change the provider code in the Prv column to the Dental Assistant
- If the Dental Assistant is working alongside multiple dentists, select the Dental Assistant record that corresponds to the dentist who has instructed the DA. This will ensure the correct provider ID is used when claiming private health insurance via the Payment Solution link (e.g. Hicaps)
Reporting
An overview of the money associated with the x-rays taken by the Dental Assistant can be reviewed in the Accounting: Invoices and Receipts Over a Period Report.
- Go to Location Management > Reports tab
- Accounting: Invoices and Receipts over a Period
- If the dentist instructing the DA is entitled to commission on the x-ray (and the commission % entered previously in the Providers tab for the DA), this can also be viewed by selecting Commissions in the Report’s Parameters
Tariffs: Set Tariff Commission for Providers
The provider may be paid based on:
- The commission raised from invoices or receipts; or
- Commission based on treatment items performed (Tariffs*)
*This topic discusses the commission based on treatment items (Tariffs)

- Go to Location Management > Tariffs tab
- Location: Select the Location
- Highlight Provider name from the list
- Click on Add New Icon to add the New Period Start Date of the tariff commission. (The date that this tariff commences)
- The commission value is entered for each and every item for the selected provider
- This can be added as a monetary value ($ column) or a percentage of the invoice or receipt for each individual item (% column) Repeat for each Provider
Create / Edit Provider Letterhead & Logo
The Provider Letterhead will appear on all Invoices, Receipts and Treatment Plans when Provider Letterhead is selected in the Type of Letterhead for Invoice/Receipt PrintoutGeneral Setting.
- Go to Location Management > Providers tab
- Select the Provider
- Enter/update the required information
- Click Letterhead & Logo Setup
- Enter the details as required
- To add a logo, click Find Logo
- The logo needs to be saved in each computer in the same folder, or a shared location (eg the server)
- The image can be .BMP, .GIF or .JPG formats
- Click Design A4 or Design A5 to design the letterhead
- Select the field and click
to change the font face, size, style and justification
- The fields and logo can be dragged around and placed in a different area of the page
- Click Save when completed.
- This needs to be repeated for every Provider
Manage the Provider Professions List
- Go to Location Management > Providers tab
- Operations menu > Professions List
- Click Add to add a new profession to the list
- Place a tick in Show in Accounts if the Provider is to appear in invoices
- Click OK
Allocate the position to a Provider
- Go to Location Management > Providers
- Select the Provider
- Select the Profession from the Position drop list
Setup Cost (Expenses) to Providers
Example:
- Lab Expenses: 100% cost to provider. The expense amount is $45.
- Provider will be liable for $45 x 100% = $45.
- This in turn will result in reducing the provider’s commission by $45.
Add Cost to Provider (%) to a Provider
- Go to Location Management > Providers tab
- Select the relevant provider
- Click Cost for Expenses
- Select the expense(s)
- Click Set ($) to select rows...
- Enter the percentage
- Click OK
- Click Close
Make a Provider Inactive/Reactivate Provider
- Go to Location Management > Providers tab
- Select the relevant Provider
- Remove the tick from Is Active
- Read the inactivation instructions
- Remove security access
- Inactivate Appointment Book
- Redirect Standby List Patients to another Provider
- Remove Provider from Team Books (if applicable)
- Move Patients with this Provider as their Main Provider to another
- Click Yes to continue with the inactivation
The providers Appointment Book must also be marked as inactive. See Inactivate (remove) / Reactivate an Appointment Book section for instructionsReactivate Provider
A Provider that has been marked as inactive can be made active again.
- Go to Location Managment > Providers tab
- In the Operations menu, tick Show inactive providers as well
- In Provider, select inactive provider
- Tick Is active
Reactivate Security Access
- Go to Location Setup > Security tab
- In the Record menu > select Show Users or Groups with Denied Access
- Double click reactivated staff member
- Select Allowed
- Select OK
Link Appointment Book to a Provider
- Go to Location Management > Providers tab
- Provider: Select the relevant Provider from drop list
- Appointment Book: Select the relevant Provider from the drop list
Setup Provider to only see their own Appointment Book
Appointment Book and Provider Setup
Each provider must have their own book and be linked to the provider- Add New Appointment Book for each provider
- Setup a Provider (see above section) > Link Provider to their Appointment Book
Activate Feature
Turn on the feature in General Setting and having the system security level as personal access
- Go to Location Setup > General tab
- Group: Appointment Book
- Show only authenticated provider in the drop-down lists of the Appointment Book module = Yes
- Group: System Settings
- System security level = Personal access
Setup Book View
- Provider login to D4W
- Go to Appointment Book > Options menu
- Select Setup all book...
- Highlight his/her provider book > Select Modify...
- Tick For all provider
Security
Setup Security to stop providers from setting up a book or giving themselves access to see other Provider's books.
- Go to Location Setup > Security tab
- Record menu > Select Security Status
- Setup security for:
- Setup all books
- Providers tab
- Highlight the group set up for the provider > Untick Actions to remove providers from having access
Setup Agreement Holder (Provider) details for NZL Dental Benefits Scheme claiming
- Go to Location Management > Providers tab
- Select the relevant Provider or add a new provider
- Tick OHSA/SDSA Agreement Holder
- Enter the Payee No
- Enter the Agreement No
- Enter Provider ID
Update Agreement No
- If updating the Agreement No ensure to start a new Period by clicking the
icon
- Click
icon
- Enter New Period Start date:
- Click Ok
- Click Exit
- Enter new Agreement No
Related Articles
Setup New Provider & Manage their Records in Dental4Web
This article covers Setup & Management of any type of Provider. Providers also includes: Dentists and any Dental Practitioner with a provider number, Locums, Cert IV Radiography Elective Assistants, Dental Hygienists, Therapists & Oral Health ...Setup & Manage Staff Records in Dental4Web
Any member of staff/employee requiring access to Dental4Web that is not a Provider must be added in the system as a Staff Member. Where do I find Staff Records? Click the navigation menu > Management > Staff page Setup Staff Records Feature Flash ...A Kickstart to New Staff Training for New Provider in Dental4Windows
Give your new dentist a head start with targeted Dental4Windows training. This collection includes links to our training tools, key information, and the interface features most commonly used in their role. These articles represent the essential ...Setup & Manage Staff Records in Dental4Windows
Setup & Manage Staff Records including add new staff members, provider assistants, create role positions, mark staff member as inactive. Set up Staff Records Add a New Staff Member Feature Flash Video: Add New Staff Any member of staff that is not a ...Setup & Manage Automated Appointments in Dental4Windows
Below is how to setup and send various messages using Automation. Setup and Send Automated Patient Check Out SMS The patient will receive an SMS when they are marked as Checked Out in the Appointment Book. Practices can insert their feedback survey ...