Working in the Treatment Page (Clinical features) in Dental4Web

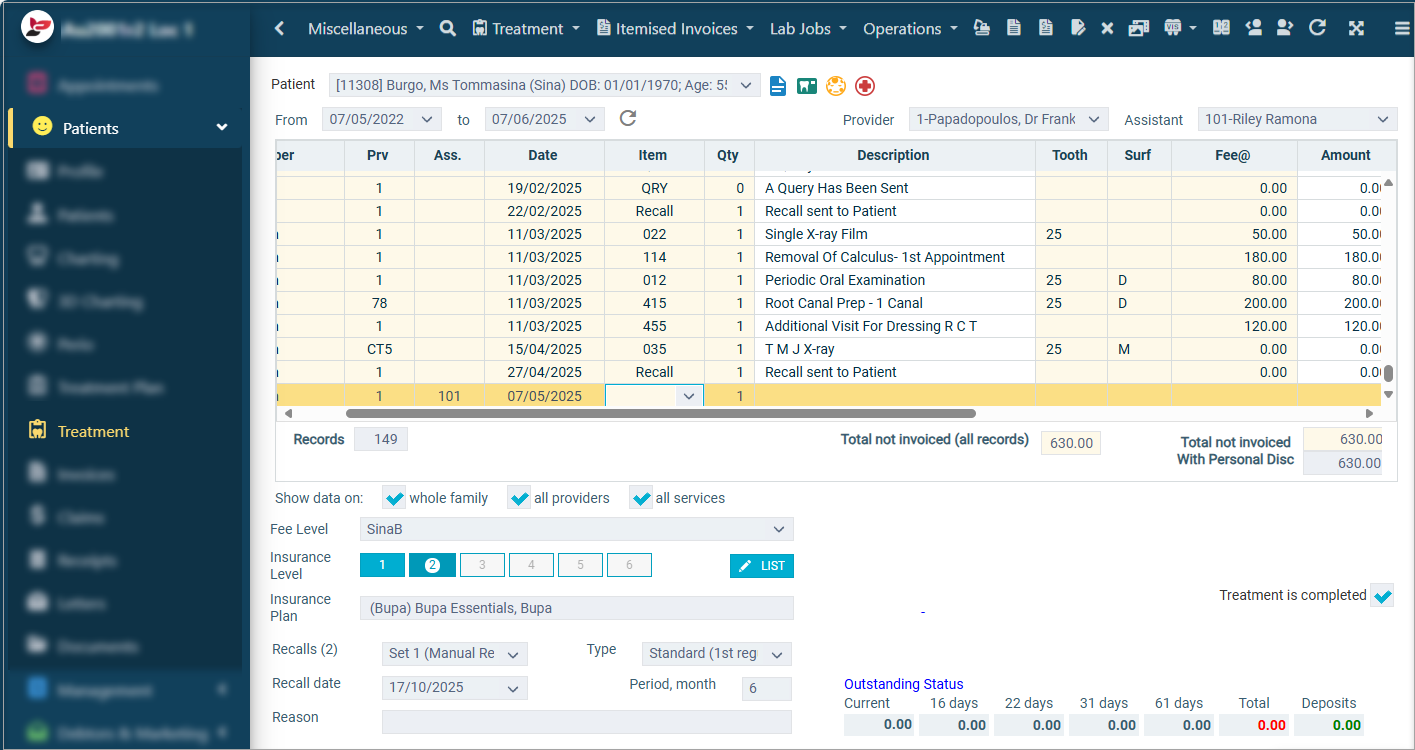
The Treatment page is used for both clinical & admin purposes. The purpose of this article is for the clinical side of treatment and includes instructions on Treatment plan transfer, Treatment completed, clinical notes (incl fast notes).
Links to the various other related features including the admin sides of treatment
is included throughout.
is included throughout.
Where to Find the Treatment page
Click the navigation menu > Patients > Treatment page
Family or Individuals Views
When patients are grouped into a family; the view in Treatment, Invoices, Claims and Receipts pages can be changed between Individual and Family view.
View Whole Family
By default, the view is set to Family. This allows for treatment to be entered for all family members in one place, then to invoice/claim/receipt as one.
- Within Show data on, tick Whole Family
- All family members who have had treatment performed will show
- Use the drop list in the Member column to select the patient and enter new treatment
View Individual File
- Patient: Select the relevant patient to view
- Within Show data on, remove tick from Whole Family box (the Member column is no longer visible)
Transfer Items from Treatment Plan to Treatment
When items listed on a Treatment Plan have been completed, they need to be moved to the Treatment page to process the invoice and/or payment.
- Treatment toolbar > Transfer from Treatment Plans / Click transfer icon
- Select the Date of the treatment plan to view (optional)
- Select to Show Only Active Treatment Plans (optional)
- Tick to Transfer Plan Notes (optional)
- Highlight completed items
- If using visits feature and multiple items exist for the one visit, select one and then click SELECTED VISIT
- Click OK
- Items will now appear in the Treatment page
Clinical Notes
Each item row can have a clinical note added. Within the Treatment Notes window, a date/time stamp can be initiated manually or setup to auto insert.
Write notes by freehand or use the Fast Notes or Table Notes features (both discussed below)
To open the Clinical Treatment Notes window:
- Select the row
- Click in the Nt column
- Type freehand notes
- Click OK
 Find out more about Windows Voice Access and how to use with Dental4Web notes, here
Fast Notes
Fast Notes are designed to help Providers limit the time spent typing treatment notes. They are often referred to as 'quick descriptions' too.
Fast notes are available in the following areas, providing quick access to regularly used templates.
- Charting
- Treatment Plan
- Treatment
- Invoices
- Claims
- Debtors
- Laboratory Works
Setup Fast Notes
The fast Notes are setup via the navigation menu > Location Setup > Fast Notes page
Add Note to Existing Notes Group
D4Web has a list of default Notes Groups which are commonly used. See 'Add New Notes Group' below to add a new one to further categorise notes.
- Notes Group: Select the group to add the new note to
- Provider: Select For All Providers or an individual to add the note against
- Click ADD
- Enter the fast note template.
- The Enter key will allow multi-line
- The Tab key will complete the fast not
- Use the arrows on the left of the screen to move a selected note up/down in the list (optional)
Add New Notes Group
D4Web has a list of default Notes Groups which are commonly used. If the existing groups are not suitable, new groups can be added.
- Record toolbar > Edit Notes Group
- Click ADD
- Name: Enter the name of the new group
- Type: Select the type of notes that will be stored against this group
- Use in Advanced Notes: Select Yes only if Advanced Notes is included in D4Web version
- Print in Advanced Notes: Select Yes only if Advanced Notes is included in D4Web version
- Sort Order in Adv. Notes: Select Yes only if Advanced Notes is included in D4Web version
- Click EXIT
Copy Notes to another Group
Existing notes can be coped from one Notes Group to another. This is used most when notes saved against an individual Provider should then be shared with others.
- Notes Group: Select the group to copy notes to
- Provider: Select the Provider to copy notes to
- Record menu > Copy Fast Notes from...
- Notes Group: Select the group to copy from
- Provider: Select the Provider to copy from
- Select either individual rows of notes, or SELECT ALL
- Click OK
Writing Fast Notes
- Click the navigation menu > Patients > Treatment page
- Double Click in the Nt column against the relevant item
- Click the Date/Time stamp icon if automatic insert if not activated
- Select:
- Fast Notes tab
- Provider to view
- Notes group: Select the group
- Select the fast note Description
- Click OK
Table Notes and Grids
In addition to clinical notes, extended information can be entered and viewed efficiently for different dental procedures and assessments in the Table and Grid section.
Data from tables and grids show when previewing clinical notes.
- Click the navigation menu > Patients > Treatment and/or Treatment Plan pages
- Against the relevant item, click in the Nt column
- In the Treatment Notes window
- Click Table Notes tab
- Select the relevant table/grid to view
- Place cursor in field and enter information, press tab to move between fields
For more details on each table, click on the relevant topic below.
Endodontic Clinical Table Notes
Per the Clinical Tables and Grids instructions above, the below explains the fields associated with the Endodontic table/grid.
- Tooth: The Tooth ID
- Cold Test: Tested whether the tooth is sensitive to cold
- Radiographic Findings: Findings on the x-ray
- Percussion: Tested how the tooth responds to tapping on a surface
- Palpatation: Tested the sensitvity of the gingival tissue
- Other: Other relevant information
- Mobility: The mobility of the tooth (loose)
- Heat Test: Tested whether tooth is sensitive to heat
- Electric PT: Electric pulp test
- Selective Anaesthesia Test: Whether the tooth has been tested with a specific anaesthetic
- Transillumination: Test of light through the tooth
- Pulp Polyp: Pulp polyp present or not
- Perio involved: Periodontitis involved with the tooth
RCT Clinical Table Notes
Per the Clinical Tables and Grids instructions above, the below explains the fields associated with the RCT, RCT-tooth and RCT-canal tables and grids.
RCT
- Tooth/ Clamp: The Tooth ID, type of rubber dam clamp used
- Canal: The tooth canal (e.g. Mesio-buccal canal)
- Length: The length of the canal (e.g. 24mm)
- Inst: The instrument used (H or K file, Pro Taper)
- Ref: Reference point
- WL: Working length
- Curve: Is the root curved
- Date: The date the canal was cleaned
- MAF: Master apical file
- Flaring: Flaring of the tooth post initiation of RCT
- GP: Gutta percha
- Notes: Other relevant information
RCT-Tooth
- Tooth: The Tooth ID
- Clamp: Type of rubber dam clamp
- Pulp Stone: Is pulp stone present
- Perforation: Perforation present
- Root Fracture: Root fracture present
- Resorption: Bone/ root resorption present
- Irrigation: Irrigation of the tooth
- Dressing: Medicated dressing for RCT
RCT-Canals
- Canal: The tooth canal (e.g. Mesio-buccal canal)
- WL: Working length
- Ref Point: Reference point
- MAF: Master apical file
- Instruments: The instrument used (H or K file, Pro Taper)
- Inst. Tech: Instrument technology
- MAC: Master apical come
- Obturation: Filling of the canal
- Curve Degree: Degree of the root curve
- Calcified: Calcification of the tooth canals
- Ledge: Ledge formation present
- Separated Inst: Broken instrument in the canal
Implant Clinical Table Notes
Per the Clinical Tables and Grids instructions above, the below explains the fields associated with the Implant table/grid.
- Tooth: The Tooth ID
- System: The type of implant system used (e.g. Straumann, 3I)
- Diameter: The diameter of the implant (e.g. 5mm)
- Length: The length of the implant (e.g. 25mm)
- 1st Stage Date: The date of the 1st implant stage
- 2nd Stage Date: The date of the 2nd implant stage
- Prosthesis insertion date: The date the implant prosthesis was inserted
- Implant Failure Date: The date the implant failed
- Implant Failure reason: The reason the implant failed
- Extra Procedure: Extra procedures needed to complete the implant (e.g. bone graft)
Surgical Clinical Table Notes
Per the Clinical Tables and Grids instructions above, the below explains the fields associated with the Surgical tables/grids.
SURG/OD-EO Exam:
- Date: Date of the exam
- Facial Symmetry: Symmetry of the face
- Cranial Nerve Assess: Assessment of the cranial nerves
- Swelling: Swelling present
- Lymph Node Assess: Assessment of the lymph nodes
- TMJ Assess: Temporo-mandibular joint assessment
- Others: Other assessments
- Differential Diagnosis: Possible diagnosis
SURG/OD-IO Exam:
- Date: Date of the exam
- Lips: Assessment of the lips
- Gingival: Assessment of the gingival
- Mucous Membrane: Assessment of the mucous membrane
- Hard Palate: Assessment of the hard palate
- Soft Palate: Assessment of the soft palate
- Tongue: Assessment of the tongue
- Tonsils: Assessment of the tonsils
- Floor of Mouth: Assessment of the floor of the mouth
- Hard Tissues: Assessment of the hard tissues
- Others: Other assessments
- Differential Diagnosis: Possible diagnosis
Ortho Clinical Table Notes
Per the Clinical Tables and Grids instructions above, the below explains the fields associated with the Ortho tables/grids
ORTHO-EO Exam
- Date: Date of the exam
- Growth: Assessment of growth
- Profile: Assessment of profile view
- Nose: Assessment of nose
- Lips: Assessment of lips
- Lips at Rest: Assessment of lips at rest
- Lips Together: Assessment of lips together
- Naso-labial angle: Assessment of naso-labial angle
- Labio-mental fold: Assessment of labio-mental fold
- Intra-Labial Gap: Assessment of intra-Labial Gap
- Upper Incisor Exposure: Assessment of upper Incisor Exposure
- Speech: Assessment of speech
- Tongue Thrust: Assessment of tongue thrust
- Breathing: Assessment of breathing
- Gingival Display- (mm): Assessment of gingival display (mm)
- Upper Incisor Exposure Smile- (mm): Assessment of upper incisor exposure smile (mm)
- TMJ Joint: Temporo-mandibular joint assessment
ORTHO-IO Exam
- Date: Date of the exam
- Dentition: Assessment of dentition
- Type of Malocclusion: Assessment of malocclusion
- Overjet (mm): Assessment of overjet (mm)
- Overbite (mm): Assessment of overbite (mm)
- Crossbite: Crossbite present
- Functional Shift: Functional shift present
- Lower arch length discrepancies (mm): Assessment of discrepancies in the lower arch length (mm)
- Upper arch length discrepancies (mm): Assessment of discrepancies in the upper arch length (mm)
- Hygiene: Assessment of oral hygiene
- Caries: Assessment of caries
- Habits: Assessment of habits
- Pain: Assessment of pain
- TMJ Clicking: Assessment of temporo-mandibular joint clicking
- Breathing: Assessment of breathing
- Tongue Thrust: Assessment of tongue thrust
- Speech: Assessment of speech
- Others: Other assessments
- Differential Diagnosis: Possible diagnosis
ORTHO-Diag Records
- Impression: Impressions taken and assessed
- OPG: Orthopantomogram taken and assessed
- Lateral cephalometric Radiograph: Lateral cephalometric radiograph taken and assessed
- Periapical Radiograph: Periapical radiograph taken assessed
- Occlusal Radiograph: Occlusal radiograph taken and assessed
- Photos: Photographs taken and assessed
ORTHO-Treat Tools
- Impressions: Impressions taken and assessed
- Separators: Separators used
- Banding: Banding details
- Bonding: Bonding details
- Arch wire placement: Arch wire details
Viewing all Notes in the Treatment page
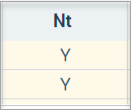
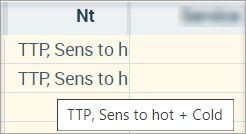
The notes will be visible in the Nt column
None: If notes exist, the NT column displays as "Y" (default setting)
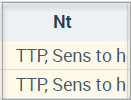
Adjust Column: If notes exist, the NT column displays the notes entered
Tooltip: If notes exist, the NT column displays as "Y" and a preview of the notes appears when the mouse is hovered over the NT column
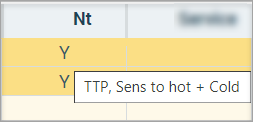
Adjust Column & Tooltip: If notes exist, the NT column displays the notes entered and a preview of the notes appears when the mouse is hovered over the NT column
The view depends on your preset selection for 'Clinical Notes on Screen' in General Settings Preview all Clinical Notes
A report of all clinical notes (incl Fast Notes & Table Notes) entered into a patient's treatment can be previewed.
- Treatment Toolbar > Preview all Clinical Notes
- Select from the Report parameters
- All treatment notes entered for the patient will be reported
Working in the Treatment Page (Admin features) in D4Web (link coming soon)
Related Articles
Working in the Treatment Tab (Clinical Features) in Dental4Windows
The Treatment page is used for both clinical & admin purposes. The purpose of this article is for the clinical side of treatment and includes instructions on Treatment plan transfer, Treatment completed, clinical notes (incl fast notes). Links to the ...Dental4Windows New Features Release Notes
The following new and enhanced features are available in: Build 6334 Limited Release From: 21/5/2026 RDS Users Release: TBC General Release: TBC Here is more information on how to search for a patients appointment and a family members appointments ...Dental4Web New Features Release Notes
RELEASE NOTES 2026 Build: 26.604 DB5909 Agent: 3.29 - Click here if assistance is required Limited release starts from: 9/6/2026 General release: 12/6/2026 WHATS NEW / WHATS BETTER This is a maintenance only build ...A Kickstart to New Staff Training for New Clinical Staff in Dental4Windows
Give your new clinical staff a head start with targeted Dental4Windows training. This collection includes links to our training tools, key information, and the interface features most commonly used in their role. These articles represent the ...Working in the Treatment Page (Admin features) in Dental4Web
The Treatment page is used for both clinical & admin purposes. The purpose of this article is for the administrative side of treatment and includes instructions for invoicing, payments & reprinting. Links to the various other related features ...