Using Documents page in D4Web
 Here we will cover the different options for document viewing, uploading/ downloading, emailing, scanning & editing folders
Where to find the Documents page
Click the navigation menu > Patients > Documents page
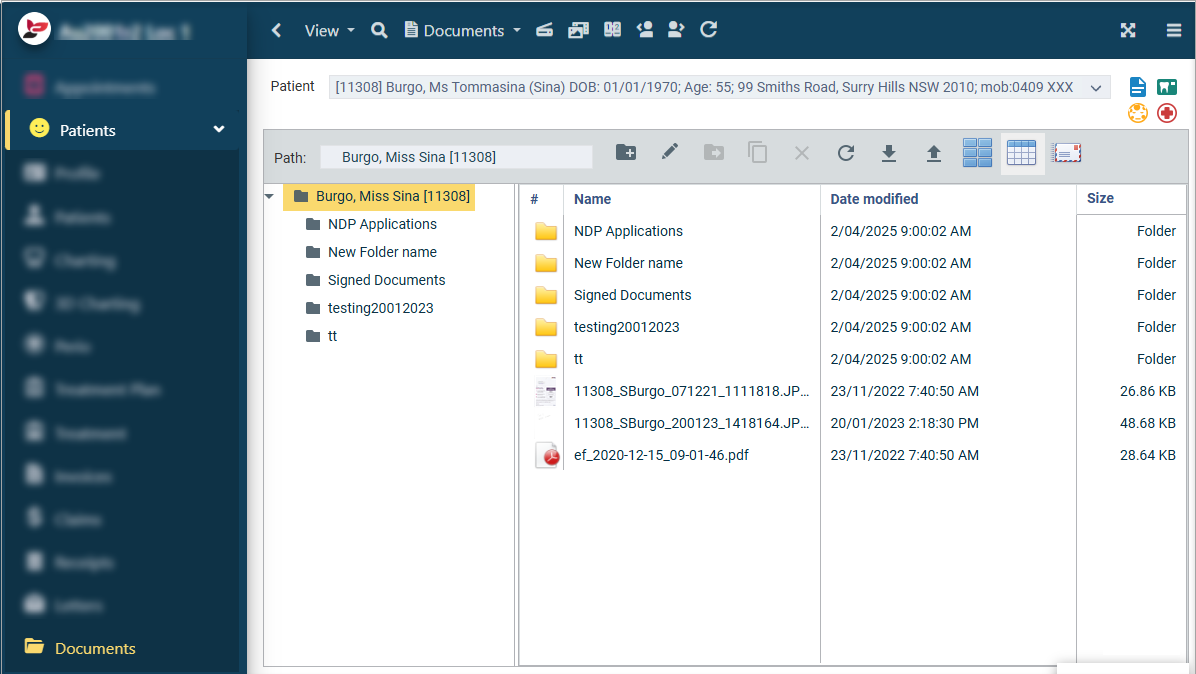
View Options in Documents
The following options are not only available when viewing Documents from Documents page but also from Charting, 3D Charting and/or Perio pages.
Select the preferred method:
Thumbnails:
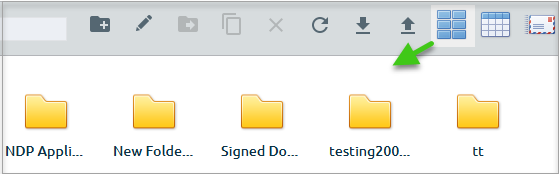
Details:
Download a file from Documents
Files and Folders can be downloaded from D4Web Documents page.
- Select the file to download
- Icon toolbar > click Download icon
Upload a File to Documents
Files can be uploaded into D4Web Documents.
- Icon toolbar > click Upload icon
- Find and select the file from the files explorer
- Click Open
- The File or Folder selected is now in the Documents page
Move a Document to another Folder
To move a document to another folder:
- Highlight the document in question
- Click Move Icon
- Select Destination Folder
- Click OK
E-mail from Documents page
Its possible to send a file or folder from Document Manager via e-mail.

Ensure the e-mailing from a patients' file feature is setup before proceeding.
Use E-mail for Single Messages & E-mail sending service for Single Message (link to General Settings coming soon)
- Select the file/folder. (To select more than one, hold the Ctrl key and click additional files/folders)
- Click E-mail Icon
- In the E-mail window:
- From: Practice e-mail automatically enters
- To: Enter the recipient e-mail address; by default the patients' e-mail is entered
- CC: Include additional e-mail addresses if required
- Subject: The e-mail subject
- Attached: The selected file/s
- Enter any other text to appear on the e-mail
- Click SEND
Scanning to Documents
- Documents toolbar > Capture from Scanner
- Or click Scanner icon
Select the properties of the image in the Capture from Scanner window
- Click SCAN
- Once scanning is complete, the image/document will be automatically named and saved in the folder
- You are able to right click on the file name and select the following options:
- Rename: Give the file another name
- Move: Move document to another folder
- Delete: Remove the file from the Document Manager
Related Articles
Using Documents in Dental4Windows
Listed below is how to Import and scan to Document manager, e-mail from Document manager and view eSigned treatment plans - eSignature device. Import to Document Manager Files and Folders can be imported to Document Manager. Import Folder Go to ...Setup & Manage Documents in Dental4Windows
Listed below are instructions on Dental4Windows Cloud: import to Document manager, create a folder, change file or folder view or delete a file or folder in document manager. Dental4W Cloud: Import to Document Manager Files and Folder can be ...Setup & Manage Documents page in D4Web
Upload / Download records (documents, applications, files, folders, images) and save/store in Patients Document page Where to find the Documents page Click the navigation menu > Patients > Documents page Accessing Documents for the first time When ...PatientCare Using the Portal
Within the Patientcare portal, a user is able to Resolve Alerts, chat to patients, add notes, resend emails, unsubscribe from future communication, download appointment summaries and edit message content Managing Patient Responses Resolving an Alert ...Using Charting features in Dental4Web
Some of the features found in Charting: View Mixed, Deciduous or Adult charts, layering, View & link to Documents / Imaging & Treatment Plans Where to find the Charting pages Click the navigation menu > Patients > Charting or 3DCharting page Note: ...