Second Opinion Functions for Mediasuite users

Listed below are instructions on using Second Opinion in MediaSuite.
Second Opinion: Send Images for Review
There are two ways to configure MediaSuite for sending images to Second Opinion.
Automatically send all images
With this option, all x-rays that you acquire will be automatically sent to Second Opinion and the detections will be automatically loaded.
Manually send selected images
Sending images manually greater control over what images are sent to Second Opinion. Once images are sent, the detections will be automatically downloaded.
- Select the image(s) on left
- Click AI icon arrow > Send Image(s) or
- Right click on image > SecondOpinion > Send Image(s)
- Click OK
- Once detections are downloaded there will be a notification in the Windows Notification Centre (some computers may have this feature disabled)
Second Opinion: Download Detections
Detections can be manually downloaded. This may be needed when it takes longer to process the image and the Blue status indicator is present.
- Select the image on left side
- Go to AI icon arrow > Download Detections or
- Right click image> SecondOpinion > Download Detections
Second Opinion: Status Indicators
Located at the image's top left corner, this indicates the current communication status for that image.
Blue: 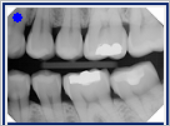 - Image was sent to Second Opinion
Yellow:  - Detections are downloading
Green:  - Image is ready with detections
Grey:  - Image was not sent
Red: 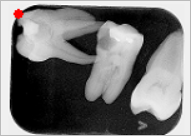 - An error has occurred
Second Opinion: View Detections
Detections can be viewed on greyscale images. It can show what caries are present and various other detections. Any image with Second Opinion detections will have Green status indicator.
- Select image(s) on left column
- Click arrow on the Bulk Action AI icon > View Detections
- Or right click image > SecondOpinion > View Detections
- Detections will be available on tabs in viewer window
- A toolbar will appear on the right-hand side
Confidence Slider
Filter displayed detections based on confidence levels.
- Click desired confidence levels to be displayed
- Numbers indicate how many detections are found under each confidence level
- Human: Only human verified detections
- High: High confidence and human verified detections
- Medium: High, medium and human verified detections
- Low: All confidence levels including human verified detections
AI Viewer Panel
Quick View Control
- Hold the spacebar on keyboard to temporarily hide detections
- Release the spacebar on keyboard to show detections again
Pathology Controls
- Untick Pathology to hide all pathology from view
- Untick a pathology type to hide from view e.g. Calculus
- Coloured circles indicate pathology type
- Numbers indicate count per pathology
Non-Pathology Controls
- Untick Non-Pathology to hide all Non-Pathology from view
- Untick Non-Pathology type to hide from view e.g. Filling
- Grey circles indicate the occurrence count
Detection System
Detection Confidence Indicators
Confidence levels are shown by dot patterns
- Three filled dots: High confidence in detection accuracy
- Two filled dots (one unfilled): Moderate confidence in detection accuracy
- One filled dot (two unfilled): Low confidence in detection accuracy
Second Opinion: Toolbar Functions
Various tools are available in the Native Second Opinion toolbar. All view adjustments apply to the current viewing session only and are not permanently saved.
Ruler
- Click Ruler icon
to activate
- Click starting point on the image and move the curser to desired measurement area
- Click again to end the measurement
- Click Ruler icon again to remove measurement and deactivate the tool
Edit
- Click Edit icon
to activate
- Move curser over unwanted detections
- Click red x to remove detection
- Click Edit icon again to exit
- To add detection back, click Edit icon and click green tick
Measurements
- Bone level Measurements are enabled by default
- Toggle on / off for individual images by clicking the Measurements icon
Tooth Parts
- Click Tooth Parts icon
to display Tooth Parts filter to image
- Click icon again to turn off
- Click Tooth Parts arrow to show legend
Image Adjustment Tools
Changes apply to the current view only and are not saved
Brightness  Hover over icon to access the adjustment slider
Contrast  Hover over icon to access the adjustment slider
Zoom  Hover over icon to access zoom controls
Invert  Toggle image inversion with a single click
Pearl Enhanced View Adjust image clarity (sharpness) via slider
Pearl Enhanced View
Rotate  90° clockwise rotation per click
Flip  Horizontal flip with a single click
Reset View  Returns image to the original orientation
Second Opinion: Operations Log
Operations Log displays the status of the patients images and shows any errors that have occurred. It also provides a history of system communication.
- Select an image on the left hand side
- Go to AI icon arrow > View Log or
- Right click image on left
- Click SecondOpinion > View Log
- Request ID: The unique identifier sent to Second Opinion
- Image ID: MediaSuite image ID number
- Status: Status of image sent to Second Opinion e.g. Downloaded
- Message: Any error messages will show
- Click Refresh to refresh Operations Log
- Click Close to exit
Related Articles
Second Opinion Functions for MediaWeb PACS users
Assess and detect dental pathology in x-rays via the Second Opinion interface. Integrated within MediaWeb PACS, users can automatically send radiographs and receive detections within MediaWeb PACS and view detections in a special viewer.. Note: ...Pearl On Demand for Dental4Windows & Mediasuite users
Second Opinion (an AI-powered real time radiologic detection aid for dentists) is an integration application that links from Mediasuite. Check Out the Second Opinion website link & training video, found at the end of this article Launch ...Mediasuite New Features
What's New Now The following new and enhanced features are available in: Build 4.072 For instructions on how to upgrade, click here. MediaSuite New Features Release - Build 4.090 The following feature is available in Build 4.090 and higher. New ...MediaSuite: Capture
Listed below is how to setup and manage devices and images and how to capture an image. Capture Device Settings Go to Capture menu > Setup Advanced Enter the password. The password is the current date in short format. Example: the password for ...eSupport Knowledge Base Navigation for Dental4Web users
The eSupport Knowledge Base for all Centaur Software products is housed in a single shared portal. The portal contains "How to" instructions for all Centaur Software products, applications, and integrated solutions that we support. Access the New ...